If you are new to Apple devices or haven’t bought or canceled a subscription before, don’t worry. In this blog, you will learn how to see the present subscriptions on iPhone/Mac/Windows PC and how to buy or cancel them in detail. Moreover, you will also learn what happens if you cancel a subscription and how to get a refund. So, keep reading to effectively manage your Apple subscriptions.
How to view Apple subscriptions on different devices?
To manage your Apple subscriptions, you first have to view all your subscriptions. There are different methods to do so on different devices, but don’t worry, we will show you how to view your subscriptions on all devices.
How to view subscriptions on iPhone or iPad?
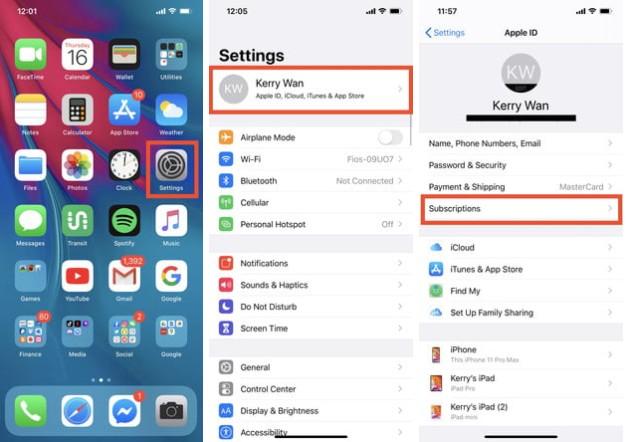
Method 1. To view your subscriptions on iPhone:
- First of all, pick up your iPhone and go to the settings menu.
- You will see your account ID at the top; click on it.
- Scroll down until you see the “Subscription” option; choose it > Finally, All your subscriptions will appear.


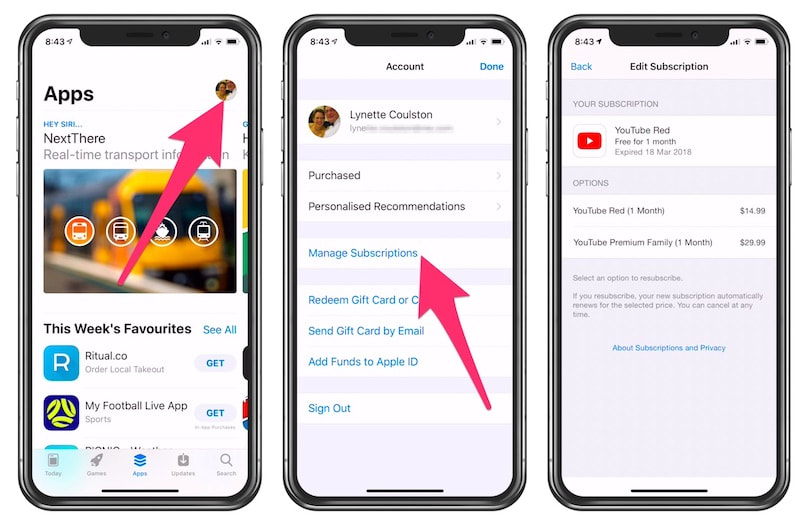
Method 2. Another method for viewing subscriptions is as follows:
- Go to the App Store.
- At the top right corner, you will see your profile icon, click on it.
- Look for the subscription tab and click on it > this will provide you with the same view as the first method.


How to view subscriptions on Mac?
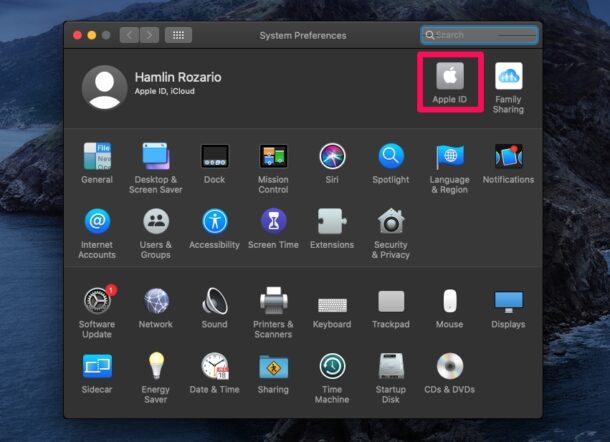
To view your subscribed services on Mac, follow these steps:
- Find the Settings icon in the Dock menu at the bottom of the screen. Then, a new window will open where you will see your Apple ID; click on it.


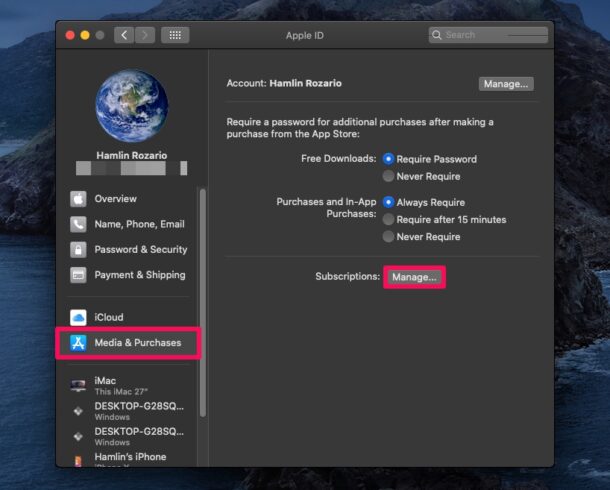
- At the bottom left corner, you will see your “Media & Purchases” option; click on it.
- Now, in the middle bottom of the screen, you will find the “Subscription” name, and next to the “Manage” option, push it. That’s it.


How do you view subscriptions on a Windows PC?
Follow these steps to view and manage Apple subscriptions on your Windows PC:
- On your Windows computer, open the iTunes app.
- At the top menu list, there you will find “Account.” Choose it > click on “View my account.”
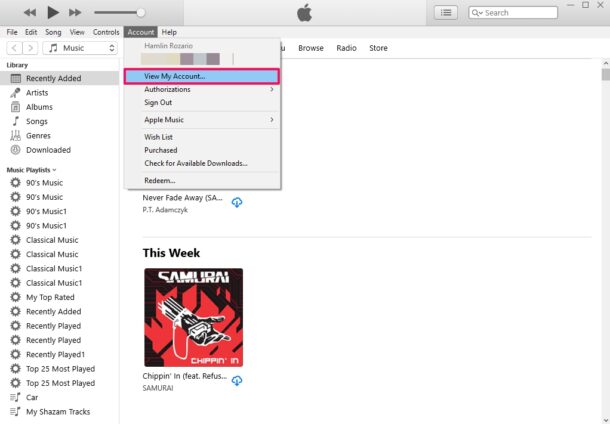


- Scroll down until you find the “Subscription” option; tap on it.
- At the bottom right corner, you will find the “Manage” option; choose it.
How to cancel Apple subscriptions from different devices?
After you have viewed all your subscriptions, if there is any undesired subscription, you have to cancel that but the question arises “How”. Again, don’t worry; just continue reading to get a step-by-step guide to cancel your unwanted subscriptions. Also, there are different methods for different devices, and we will go through all of them. The methods are almost same as above just with a few additions.
How to cancel subscriptions on iPhone or iPad?
To manage your Apple subscriptions, canceling subscriptions is a key part. To cancel subscriptions on iPhone or iPad:
- Open Settings.
- Tap on your name on the top.
- Click “Subscriptions” > A list of active subscriptions will appear at the top, and at the end, there will be a list of inactive subscriptions.
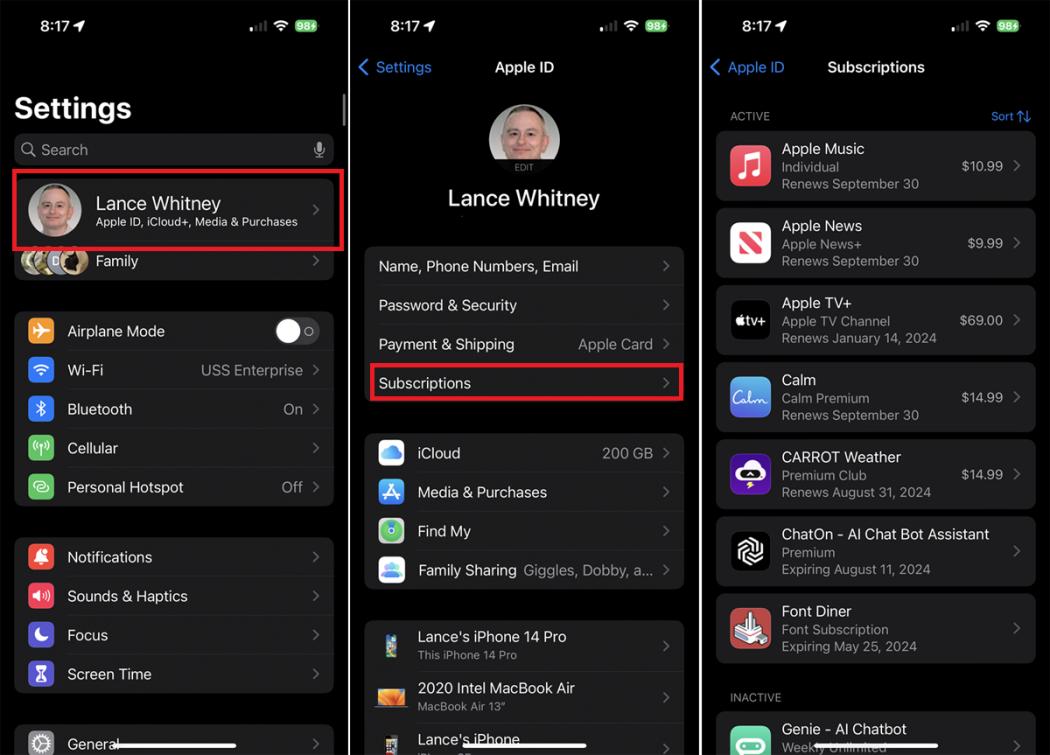


- Tap on the subscription you would like to cancel.
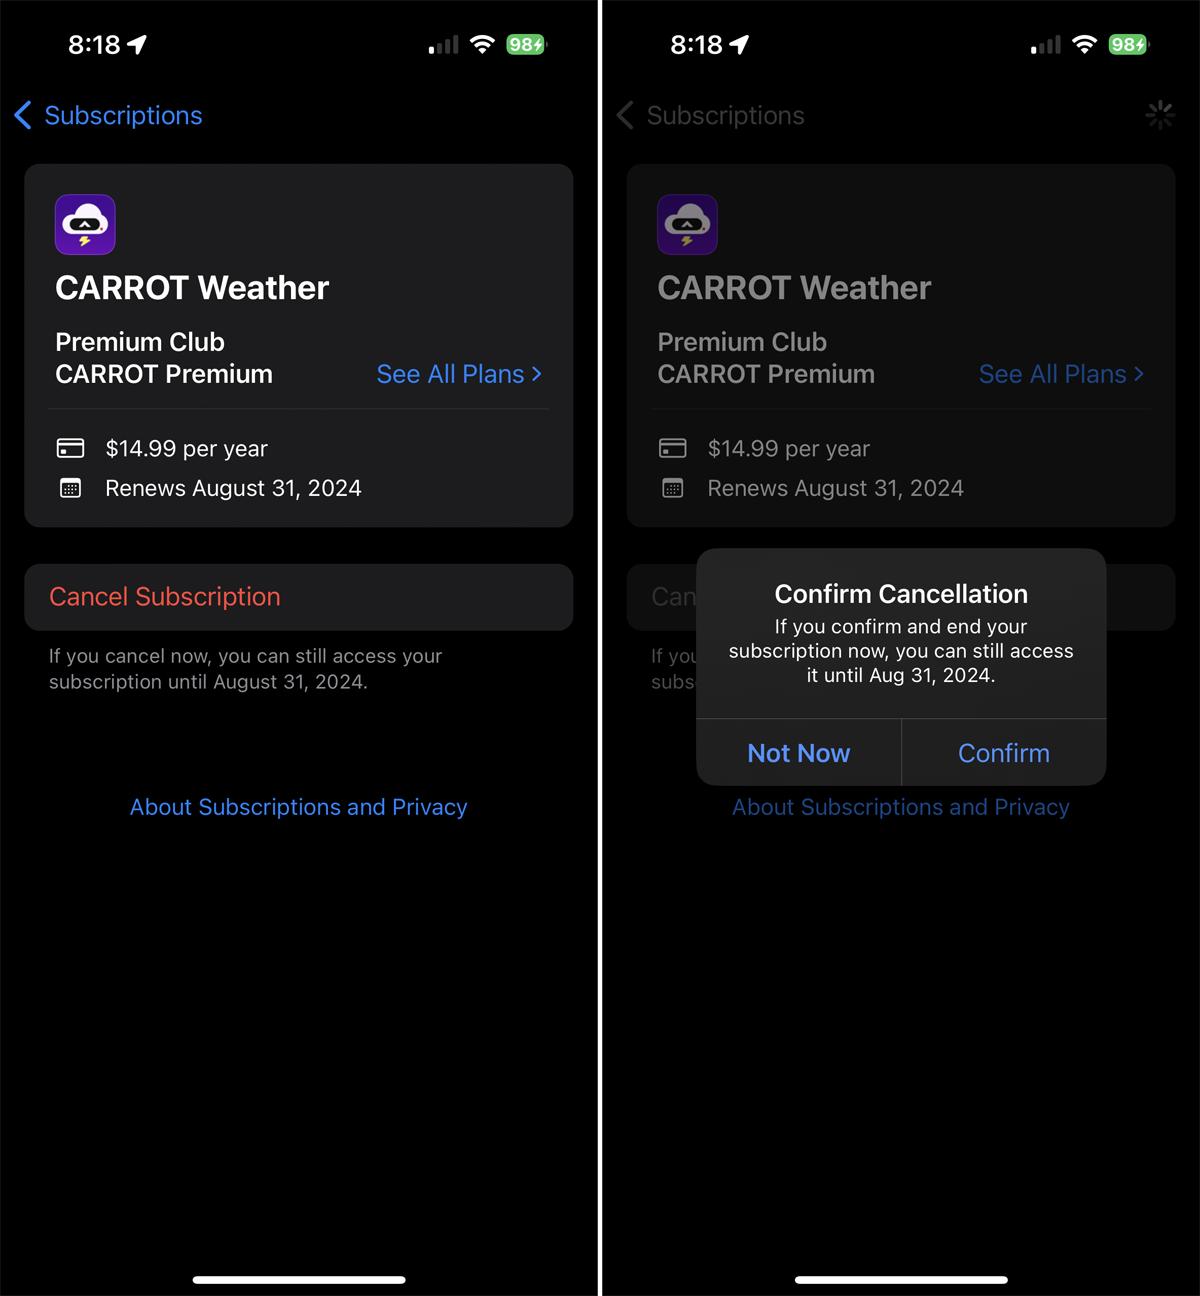
- Then tap on “Cancel Subscription”.
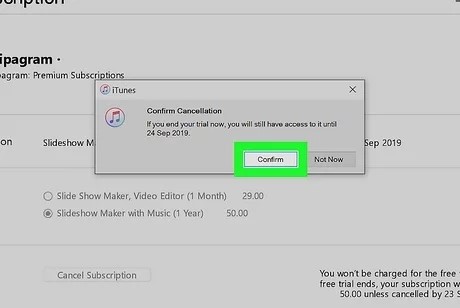
- A notification will appear; tap on “Confirm” to cancel that subscription.


How to cancel subscriptions on Mac?
To cancel Apple subscriptions using a Mac, follow these steps:
- Open the App Store from the Dock (menu at the bottom of the screen). If you don’t find it there, click on the Apple icon at the top left corner, and a drop-down list will appear. Choose the “App Store” option from that list.
- Now, at the bottom right corner, you will see your profile name; click on it.
- Then look for the “Account Settings” option and open it.
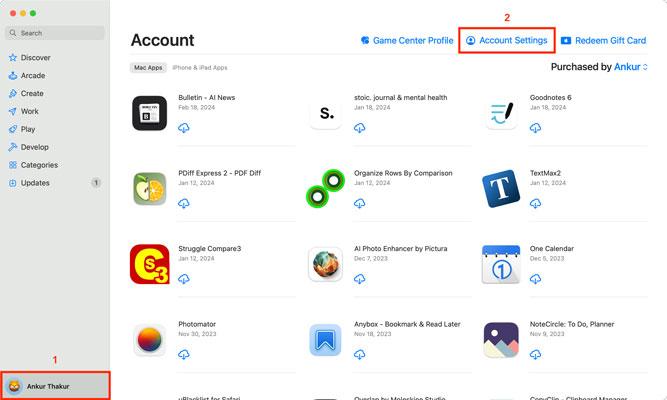


- Scroll down to the “Subscription” option and choose the “Manage” option next to it.
- Select the subscription you want to cancel > Click “Cancel Subscription”.
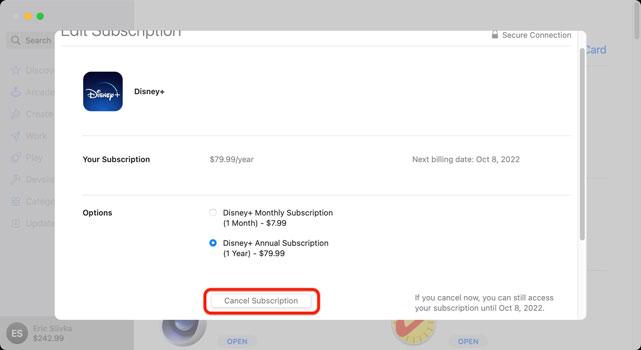


How do you cancel subscriptions on a Windows PC?
To cancel subscriptions on a Windows PC, follow these steps:
- Open “iTunes” on your PC.
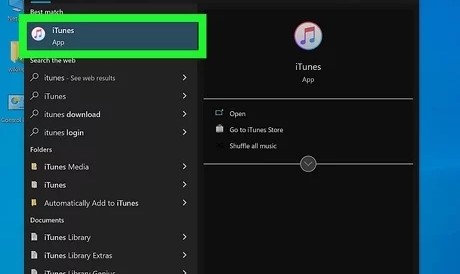


- From the top menu bar, select the “Account” option.
- Then click “View My Account”.
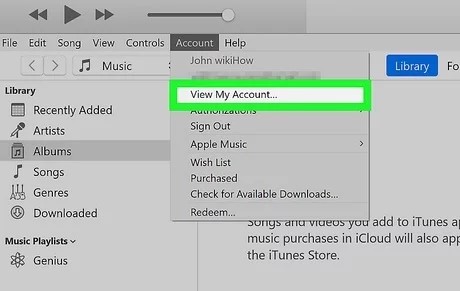


- Scroll and click on the “Settings” option.
- Next, Click on the “Subscription” option.
- Then click on “Manage” (bottom right corner).
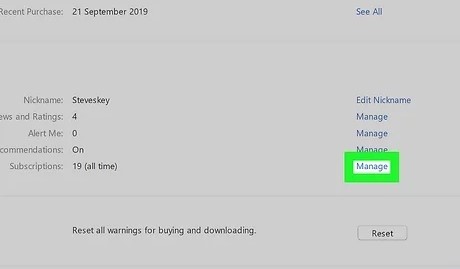


- Find the subscription you want to cancel and click “Edit”.
- Click “Cancel Subscription” and “Confirm”.


How to share Apple and App Store subscriptions with family members on iPhone?
Paying again and again for the same subscription is a waste of money because Apple allows you to share subscriptions with your family members by paying just once. You can see below how to share Apple and App Store subscriptions.
How to share Apple subscriptions with family on iPhone?
To share Apple subscriptions with family, follow these steps:
- First of all, pick up your iPhone and go to its settings.
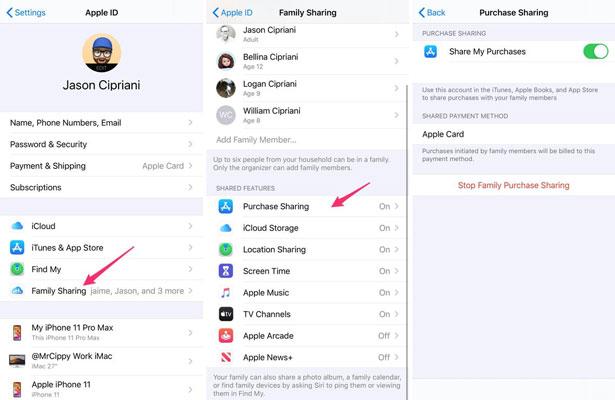
- In the settings menu, click on your Apple account profile and scroll down until you find the “Family Sharing” option; click on it.
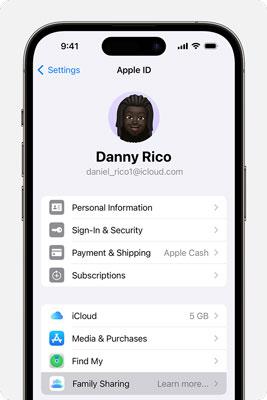


- In the “Family Sharing” menu, click on the add icon (top right corner) and invite the family members.
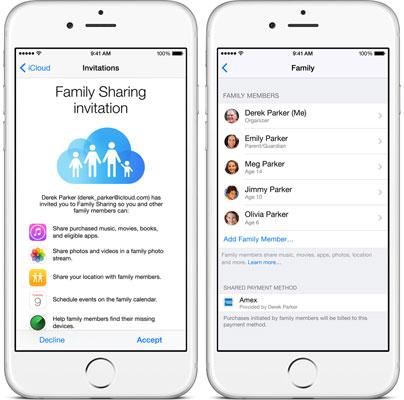


- Go back to your account’s main settings, and you will see the “Subscriptions” option there; click on it.
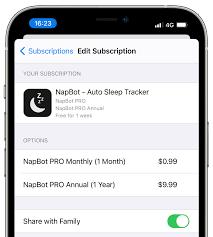
- In the subscriptions menu, scroll down until you see the “Share with Family” option; switch it on. That’s it.


How to share an App Store subscription with your family on iPhone?
To share App Store subscription with family on iPhone:
- Simply go to settings and click on your profile.
- Scroll down and click on the “Family Sharing” option.
- Click on the add icon at the top right corner and invite your family.
- Now, return to the “Family Sharing” main menu and look down until you find the “Purchase Sharing” option; open it.
- In the”Purchase Sharing” menu, there will be a toggle switch; turn it on. That’s it; Your family members can go to their App Store and download the same app without paying anything.


How to delete expired or canceled Apple subscriptions on iPhone?
Unfortunately, there is no way that you can delete an expired or canceled Apple description from the history, but it will automatically disappear after a year.
However, there are 2-ways in which you can remove an expired Apple subscription:
- Create a new Apple ID.
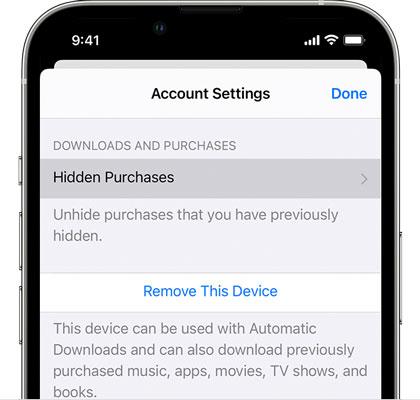
- Hide App subscription.
Well, creating a new Apple ID is a hassle and not a practical option, but hiding the app is easy, and the only option available you can do is the following way.
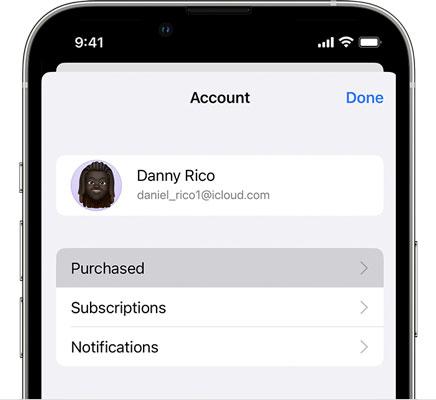
- Open the App Store and click on your account ID (top-right corner).
- Now, click on the “Purchased” option, and a list of all the apps you have bought will appear.


- Go to the app which you wanna hide > swipe left on the app, and you will see a “Hide” option on the right; click on it. That’s it.


How can parents monitor and track canceled or removed subscriptions on their phones?
No kid likes to give access of their phone to the parents and with so much harmful apps (games, dating, adult, etc.) on the internet, it has become very easy for the kids to get spoiled. So, if you haven’t linked your iPhone, and your kids aren’t allowed to pick up their phone, there is practically no way for you to monitor their well-being. Don’t worry.
By keeping the parents’/kids’ problems in mind, many companies have made parental control apps that work in the background secretly and keep an update for parents 24/7. One such parental app is FlashGet Kids, which can help a parent in many ways.
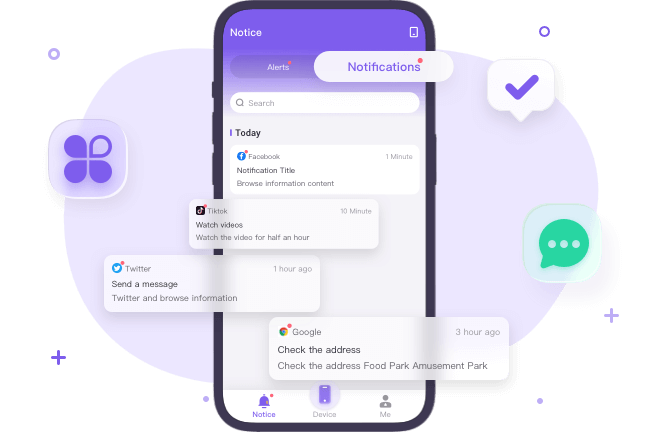
- It has a “Notification Sync” feature that sends all the notifications of the kids to the parent’s phone in real-time, which also includes downloaded apps and their subscriptions. So, even if your kids cancel or hide a subscription, you will know it.


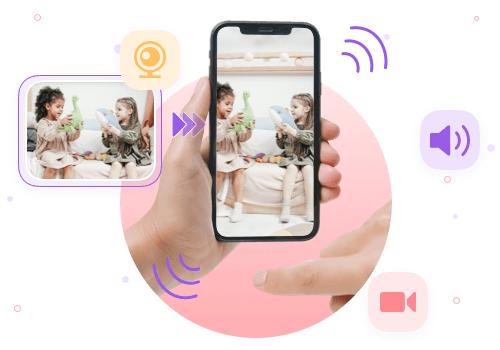
- FlashGet Kids has a screen mirroring feature that allows parents to cast their kids’ phones on their phones and see what they are doing in real time.


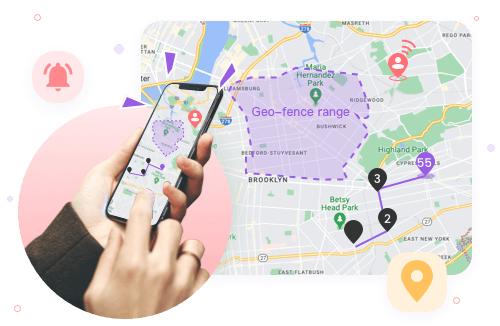
- FlashGet Kids also has a location tracking function that you can use to get an update about their whereabouts.


- Finally, you also get app blocking and screen time limit features to keep your kids on track and save them from getting addicted.
FAQs
How do you request a refund for Apple subscriptions?
If you or your kids have purchased a subscription by mistake, you can ask for a refund within 48 hours in the following way:
1. Open any browser and go to the site reportaproblem.apple.com.
2. Click on the first option, “I’d like to,” and choose “Request a refund” option.
3. Then, below, you will have to select why you are asking for a refund.
4. Finally, choose the subscription you want a refund for and submit it. Wait for 1 ~ 2 for an email about your request.
How long does it take Apple to refund a subscription?
If you have paid via credit card or a similar method, it will take up to 2 days or 48 hours for the subscription to get appear in your account balance. However, if you have paid via the mobile phone billing method, you may have to wait for 2 months or 60 days for the refund.
How to see your Apple subscriptions in family sharing?
Go to settings > click on your Apple ID > scroll down and click on Family Sharing > In the menu, look down and see the “Subscriptions” option; choose it > then you will see the “Apple Subscriptions” option at the bottom.

