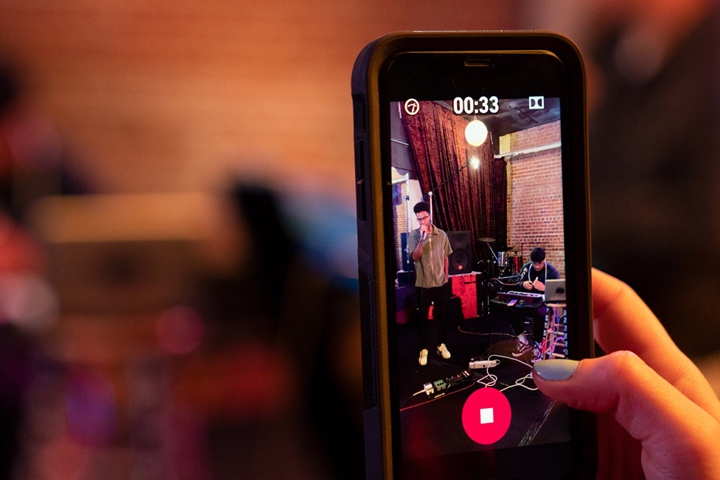
Whether you’re recording a lecture or a meeting, the ability to store audio recordings on your Android can be pretty handy. Depending upon the manufacturer, you can rely on built-in apps for this task. However, these built-in apps often lack features like instantaneous sharing. So, you might need to rely on third-party apps to record high-quality sound on Android.
The following article will build more on how you can use different methods to record sound on Android in high-quality. Hopefully, you’ll be able to use these crisp recordings to catch up on a missed lecture/meeting.
How to record sound on an Android with a built-in app?
The best part about native or built-in apps is that you won’t have to waste any time installing a third-party tool. Instead, you can get straight to recording any audio you want with a single tap.
Here is how to record sound on an Android with a built-in app.
- Unlock your phone and access the app drawer.
- Find the “Voice recorder” or “Sound recorder” tool.
- Launch this native app.
- Tap on the record button to start your recording.
- Position your phone’s mic near the speaker to catch crisp audio.
- Use the pause button to skip the parts you don’t want in the recording.
- Use the stop button to finish the recording.
- Save your recording after naming it appropriately.


A big issue that people often face with these recordings is that they won’t be able to find the saved file afterward. Usually, these saved files are buried within the data folders in your phone’s internal storage. So, it would help if you could first set up a file explorer beforehand.
Tips for optimal recording experience
Anyhow, let’s get into a few tips for optimal recording experience.
- Environment: You need to make sure that there isn’t excessive noise or static in the environment. If the mic is close to an electricity source, it will catch a ton of static. The whole recording can become unintelligible when there is too much static.
- Use a base: Don’t hold the phone in your hand when recording the audio clip and keep it on a table. That way, the audio won’t have any variations in pitch or volume when you’re listening to the playback.
- Mic orientation: Making sure that the mic is pointed toward the active speakers will have a massive impact on the sound quality. You should just make sure that there is a clear line of sight from the mic to the speaker to avoid unnecessary issues here.
All in all, you need to make sure that the mic picks up all the important audio from the speaker. Too much noise and static will just ruin your audio clips, and you won’t be able to present this audio anywhere. So, focus especially on the mic orientation and environment.
Ensure your child’s safety by monitoring their environment away from home.
How to record sound on Android with a third-party app?
If you’re not happy with the sound quality you got form the built-in app and need more features, then third-party apps can be the only fix. These apps offer quick sharing features and more flexibility when recording any audio.


So, let’s cover a few third-party apps that can help you record audio on Android.
- Otter
- Dolby On
- Easy Voice Recorder
- Voice Record Pro
- Google Recorder
All of these apps are accepted by millions of professionals. Everyone from music professionals to business trainers relies on these apps to store and share speeches and music clips with their peers.
Now that you’re aware of the most popular music apps in the market let’s get into how you can record audio with them. The overall process might vary a bit depending upon the app you’re using, but they follow a similar method.
So, consider following these steps.
- Launch the Play Store on your phone and search for any recording app like the Easy Voice Recorder.
- Download and install this app on your phone.
- Launch this app and set up the recording quality.
- Bump up the recording quality to high and then press the recording button.
- Stop the recording when the speaker is done with his speech.
The whole point of using these apps is that you’ll get access to more tools like snipping audio clips and instant sharing. On top of that, you’ll be able to easily customize the audio quality and rely on noise reduction features to improve the clip. So, test out different third-party apps listed above if you are struggling to record audio on an Android.
How to record internal sound on an Android phone?
Recording internal sound on an Android phone is useful for capturing media audio, game sounds, or system audio directly from the device. However, you’ll first have to make sure that you’re running and Android 10 or a later version to benefit from this feature.
Anyhow, Here’s how to do to record sound on Android:
- Swipe down to access the quick menu settings on your phone.
- Tap on the screen recorder tool.
- Choose internal audio.
- Tap the record button to start recording.
- Go through the audio clips you wish to record.
- Tap on the stop button when you’re done.
- Use the file explorer to access the saved recording.
Troubleshooting common issues
- Compatibility: If your device doesn’t support internal audio recording, consider using third-party apps like “AZ Screen Recorder” or “Mobizen” that offer this feature.
- App restrictions: Some applications may block internal audio recording due to DRM or privacy protections.
- Volume levels: Adjust media volume to ensure audio is neither too low nor clipping.
Benefits of recording internal sound
- Clean audio: Captures media and system sounds without ambient noise.
- Professional quality: Ideal for creating tutorials, gameplay videos, or recording streaming media.
How to record incoming audio on my Android?
Recording incoming audio, such as phone calls or VoIP conversations, can be done using specific apps or manual methods.
Here’s a detailed guide on how to do it with an app.
- Download and install any call recorder app like the cube call recorder.
- Launch the application and give it the necessary permissions.
- Ask a friend to call you to test the app.
- Use the on-screen controls to cut the recording or pause it temporarily.
- Access the recorded file within the application.
Most of the Android devices also offer built-in features to help you record incoming audio. So, if you’re not too thrilled about downloading an application, you can use the native features.


Here is how to record sound on Android without using any apps.
- Ask someone to call your phone.
- Pull up the on-screen controls.
- Tap on the record button.
- You and the caller will get an alert that the call is being recorded.
- The recording will save automatically when you end the call.
The only downside to this method is that you can’t be anonymous when recording the incoming audio. So, if you need to record a call in secret, then it might be a better idea to rely on a third-party application. That way, the other party won’t know that their call is getting recorded. On top of that, I’d recommend checking your local laws about call recording without consent. Otherwise, this can land you in a ton of trouble.
How to make a record high-quality?
Achieving high-quality recordings on Android requires attention to detail in settings, equipment, and techniques. Here’s how to optimize your recordings for the best results whenever you wish to record sound on Android.
Adjusting settings for high-quality recordings
- Recording format:
- Lossless formats: Choose formats like WAV or FLAC for the highest quality.
- Compressed formats: Use MP3 or AAC for smaller file sizes with reasonable quality.
- Bit rate and sample rate:
- Bit rate: Set to at least 256 kbps for high-quality sound.
- Sample rate: Use 44.1 kHz or higher to capture more detail in the audio.
- Gain levels:
- Adjust microphone gain: Avoid clipping by setting the gain appropriately for the loudness of the sound source.
External microphones and accessories
- Lavalier microphones:
- Features: Clip-on, ideal for interviews and presentations.
- Use for: Clear voice capture in controlled environments.
- Shotgun microphones:
- Features: Directional, reduces background noise.
- Use for: Focused audio capture in noisy settings.
- USB audio interfaces:
- Features: Connect professional microphones to your Android device.
- Use for: Studio-quality recordings with enhanced control.
Best practices for clear and crisp sound
- Minimize background noise:
- Record in a quiet environment.
- Use noise reduction techniques or software.
- Consistent volume:
- Maintain a steady distance from the microphone.
- Avoid sudden movements or changes in speaking volume.
- Wind protection:
- Use windshields or foam covers for outdoor recordings to reduce wind noise.
Remove background noise
- Noise reduction apps:
- Dolby on: Provides built-in noise reduction and sound enhancements.
- Lexis audio editor: Allows for detailed noise reduction and editing.
- Post-Processing:
- Software: Use tools like Audacity to clean up audio and remove unwanted noise.
Enhancing recording quality
- Use tripods or stands: Keeps the recording device steady.
- Monitor levels: Use headphones to monitor audio levels during recording.
By fine-tuning your recording settings, using external microphones, and following best practices, you can achieve professional-grade sound quality on your Android device.
How to remotely record the ambient sound of a kid’s Android?
Remote recording of ambient sound can help parents monitor their child’s surroundings, ensuring safety and peace of mind. Here’s more on why you might need to record the ambient sound of your child’s phone.
Purpose
- Monitor surroundings to ensure the child is in a safe environment.
- Useful for situations like online learning or when the child is away from home.
Applications
- Safety monitoring: Ensures child safety in various environments.
- Behavioral insights: Provides insights into the child’s interactions and surroundings.


If you’re interested at this point, tools like FlashGet Kids can help you remotely listen in on your child’s phone. You can set up this parental control tool pretty easily and then use the parental control dashboard to remotely access their audio. From there, you’ll be able to listen in on their surroundings without having to call them or ask them for permission.
Here is how you can set up FlashGet Kids to access the ambient sound of a kid’s Android.


- Download and install FlashGet Kids on your phone.
- Set up the app and create your parent account.
- Download and install the kid’s version of FlashGet Kids on your child’s device.
- Pair both apps by following the in-app instructions.
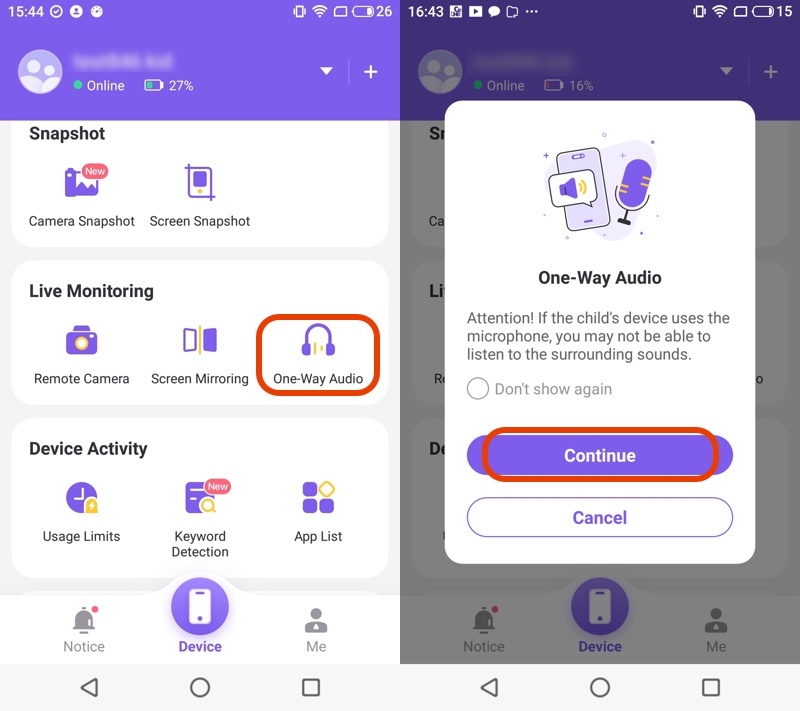
- Use your parental control app to go to the live monitoring section and tap on one-way audio.
- Choose continue and you’ll be able to listen in to the sound around your child’s phone.
The best part about this method is that you can access the saved recordings within the FlashGet Kids application as well. So, you’ll have the ability to completely log all the important conversations your child has with their peers
Final thoughts
There are tons of ways to record sound on Android devices. Built-in apps provide quick and effective ways to record sounds. Although built-in apps have limitations, third-party apps provide more features for getting professional sounds. To record internal sounds, make sure that the device can support it or use a special app to record internal sounds such as game audio or media. Moreover, You may record incoming audio from the phone or app with a dedicated app.
You may get better sounds by adjusting device settings in ways such as ensuring the sounds are not shaky. Furthermore, using external microphones will assist you in getting the best sound. Moreover, if you’re a parent, you may use The FlashGet Kids app that records ambient sounds to keep tabs on your kid. It is a one-stop parental control solution that will ensure that you always know what your child is doing outside the house.

