Living in a world with various types of threats that can be found on the internet, children’s security online cannot be underestimated.Parental control on iOS is one of the most powerful means of protecting children from internet threats, so it would be extremely useful to know how to use these tools correctly.
This guide will provide you with a step-by-step plan to ensure your child has the right guard rails and freedom to navigate the digital world safely
Parental control options on iOS
iOS devices come with a suite of built-in parental control features, collectively known as “Screen Time.” These tools allow parents to:
- Define content and privacy terms
- Manage screen time limits.
- Regulate access and downloading of applications.
- Filter web content
Although iOS provides good native solutions for managing a kid’s device, some parents opt for third-party apps for more functionality.


Here are some popular options:
Qustodio: Provides detailed and all-round tracking and blocking on different devices and media.
Bark: Has an AI mechanism that scans possible problems in text messages, emails and activity on social networks, including posts.
Norton Family: Designed to monitor online activity and offer a detailed report. it can also be controlled remotely.
FlashGet Kids: Intended to be easy to use and give the right measure of protection while enabling the children to engage in online activities safely.
Each technique has its advantages and, therefore, the best one is the one that you find most suitable for your requirements and worries.
How to set up parental control on iOS?
iOS has strong and convenient built-in parental controls that would be perfect for shielding your child from the dangers inherent in this modern world.
Let’s look at ways of putting these measures in place to enhance the safety of your child online.
How to set up Screen Time?
Screen Time is one of the features that is built into Apple devices and provides you the authority to control your child’s device.
Here’s a step-by-step guide:
- Access screen time: Move to the Settings tab on your screen, then tap on Screen Time.
- Turn on screen time: Press the option “Turn On Screen Time. ”
- Set up passcode: Set a passcode to unlock your Screen Time controls.
- Choose your role: Choose “Parent or Guardian” to supervise the cellular device.
- Content & privacy restrictions: This is where you can manage which Apps and content you want your child to see, set purchasing options, and evaluate privacy settings.
Although Screen Time is an effective option, it is important to remember that it may have weaknesses, especially for children who can learn how to get around some of the settings.
Some of those limitations include:
- Account autonomy: A child who is more than 13 years old is capable of creating his or her own Apple ID and, hence, can evade such restrictions.
- Device passcode: If your child can guess the passcode of the device, the Screen Time settings can be altered.
- App workarounds: Some of the apps that are created may have embedded browsers, which basically can evade the content filters.
- Privacy concerns: Older teens may also be against extended monitoring, claiming that they need their privacy.
To avoid such limitations, there is a need to create proper communication and trust in the process of applying parental controls for a child older than 13 years.
How to set up time limits?
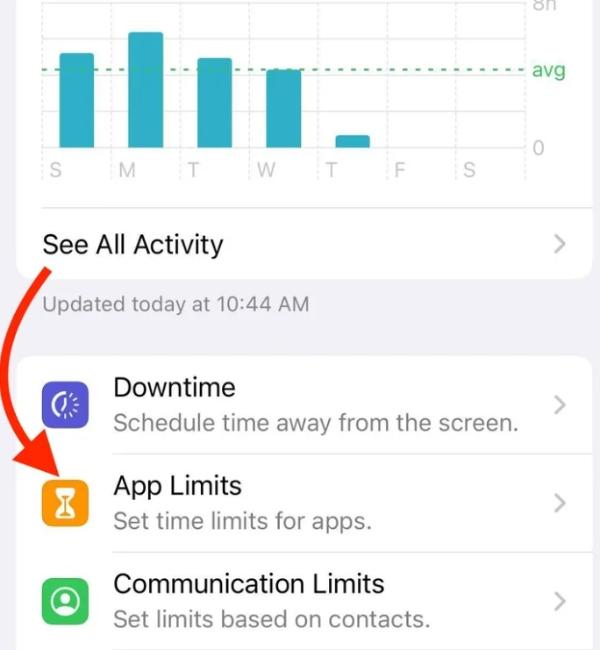
After you have installed Screen Time, you can set limits on how much time the applications can be used.
This feature is useful as it helps control the amount of time spent in front of the device, fosters a more balanced usage, and enables you to lock your iPhone remotely.


Here’s how to set time limits:
- Access app limits: Navigate to Screen Time from the settings and tap on “App Limits. “
- Add a limit: Select the ‘Add Limit’ option to add a new time limit.
- Select apps or categories: Select which apps or categories to restrict.
- Set time allowance: Analyze the daily time spent on the selected apps.
- Customize days: You can set up different numbers of hours and minutes for different days of the week.
Along with using time limits with other Screen Time options, you can ensure the child has a proper and healthy approach to digital devices.
How to block explicit content?
iOS provides great content filtering options for your child’s safety from some restricted content.


Here’s how to set them up:
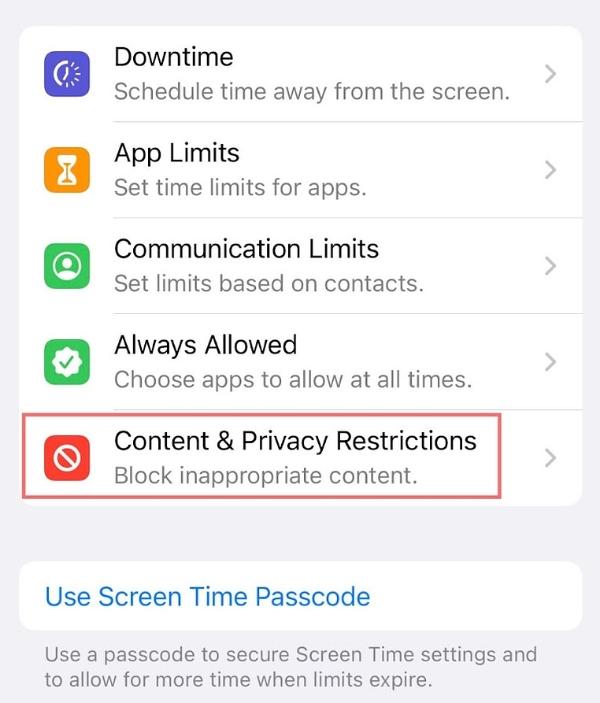
- Access content restrictions: From Screen Time, Click on Content & Privacy Restrictions. Type in the Screen Time passcode.
- Enable content restrictions: Locate and toggle the Content & Privacy Restrictions button.
- Adjust content ratings: Under Allowed Content, set the appropriate rating for movies/TV shows, music, books, and apps based on their age appropriateness.
- Restrict explicit language: In the Music & Podcasts section, uncheck the Explicit Content box.
Despite iOS offering basic content filtering, this feature could be ineffective. There are situations where certain inappropriate content might slip through the cracks, leaving your child vulnerable to exposure.
For example, Screen Time does not support parental settings for custom keyword filtering. This means that you cannot create specific filters to block certain words or phrases, potentially leaving gaps in your child’s online protection. However, third-party parental control apps such as the FlashGet Kids can do it through their keyword detection feature.
How to restrict certain website limitations?
iOS does not provide an option to create a blacklist that contains only the sites that you do not want to allow.
What the user is only allowed to do in Screen Time is select general options such as “Limit Adult Websites” or “Allowed Websites Only.
The “Allowed Websites Only” option is not the best but can be somewhat effective in the management of communication channels.
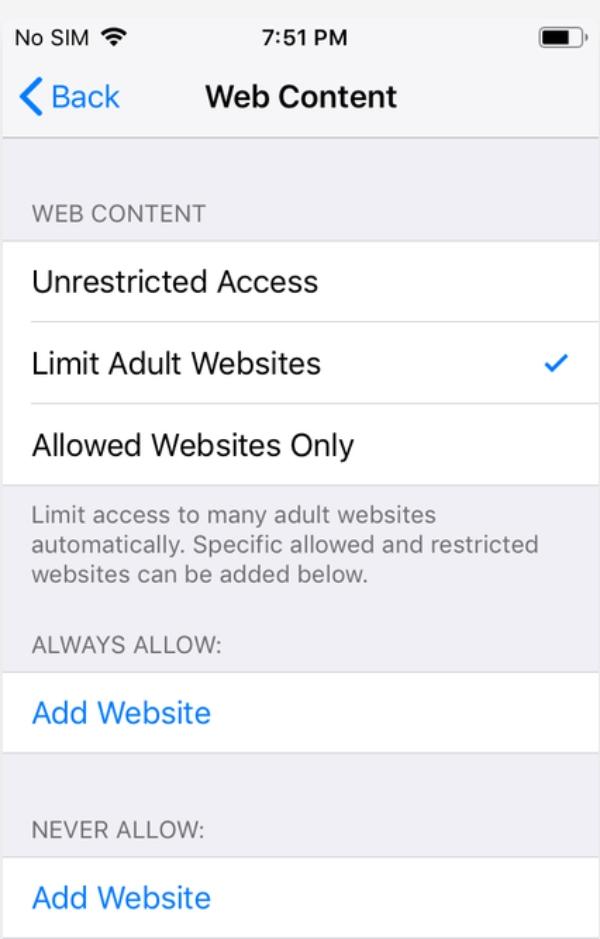


Here’s how to set it up:
- Tap on Settings, then Screen Time, and finally Content & Privacy Restrictions.
- Tap on Web Content.
- Select Allowed Websites Only.
- You’ll need to manually input sites that you wish to be allowed to enter.
How to prevent purchases & downloads?
Specific restrictions make it possible to restrict unnecessary purchases and application downloads by accident or by other unauthorized people.
- Turn on screen time: First, open the Settings app, locate the Screen Time option and switch the feature on.
- Set a screen time passcode: Use a strong, unique passcode to minimize the chance of people changing or negating the settings.
- Restrict purchases: There are two ways you can do this: go to Settings > Screen Time > Content & Privacy Restrictions and then turn it on.
- Disable in-app purchases: Go to Restrictions, choose In-App Purchases under iTunes & App Store Purchases, and set them to ‘Don’t Allow’.
- Require password for purchases: You can also opt for Always Require Password on all downloads, even if they are free.
How to turn off parental controls on iPhone?
It may be necessary to disable some of these controls at some point in time. Maybe your child has grown older, or you just wish to have complete control over your phone.
- Go to settings: Start by opening the Settings app on your iPhone.
- Tap screen tTime: Go through settings and look at the “Screen Time” feature.
- Enter passcode: Type the Screen Time passcode you set when enabling restricted access to your child.
- Disable content & privacy restrictions: Scroll down and tap Content & Privacy Restrictions.
- Turn off restrictions: Turn the switch that is next to ‘Content & Privacy Restrictions’ switch to the off position.
You can also turn off parental controls using screen time passcode via family sharing.
- Begin by going to Settings > Screen Time and tap your child’s iPhone under Family.
- Click on Content & Privacy Restrictions.
- Switch off the toggle next to Content & Privacy Restrictions.
- Go ahead and key in a screen time passcode to disable parental controls.
Enhance default parental control
Screen Time is iOS’ native parental control solution, yet it might not meet the expectations of many parents in terms of protection and configurability.
To enhance your child’s safety while using the internet, you might want to install a special parental control application such as FlashGet Kids.
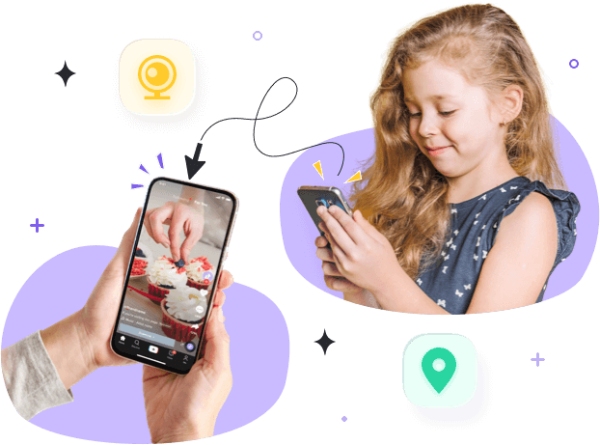


FlashGet Kids has additional functionality that will provide users with complete security and satisfaction. In contrast to Screen Time on iOS, which can be reset by a child over 13, FlashGet Kids retains control even if the child is a teenager.
This means that there is continuous protection as your child develops.
Some of the key benefits of using FlashGet Kids include:
- Real-time location tracking: Parents are able to see their child’s location in real-time, so they have no worries about how to trace or look for their child.
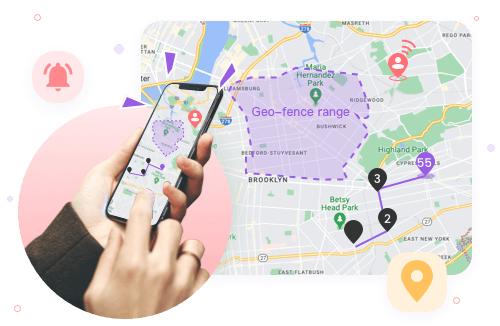
- Geofence setup: Set virtual fences and get notified when your child is in or out of specific zones.
- Detailed activity reports: You will receive detailed information on your child’s Internet usage, applications, and browsing history.
- Custom content filtering: You can block categories or certain sites, unlike iOS, which does not allow keyword filtering.
- Time management tools: Limit a child’s access to the device or specific applications, which is perhaps more flexible than in iOS.
In addition to utilizing the primary defense of iOS’s Screen Time, FlashGet Kids offers the ability to build another layer of protection through a third-party app.
How to set up location tracking via FlashGet Kids?
Location tracking enables one to determine your device’s location. This information can be used in cases where you do not know the whereabouts of your child.


- Download and install the FlashGet Kids app for parents on your phone from their official website.
- Register a FlashGet account to sign up and use the app. If you already have an account, please sign in to continue.
- Go ahead and download and install the FlashGet Kids app for kids on your child’s phone.
- Next, bind the FlashGet Kids parental control app on your phone to the kid’s version on their phone. You’ll key in a 9-digit code from the parental control app onto your child’s phone.
- Follow the prompts on your kid’s phone to allow the app to access other phone features like the camera. Ensure that FlashGet Kids is permitted to access phone activities on the child’s device.
- Launch the FlashGet Kids app on your iPhone and tap on “Live Location” on the dashboard. From there, you can see a map and your child’s device location.
- Click on “Route history.” Choose the latest 15 days you want to see to get the history of your child’s location.
- To set Geofences, tap on “Live Location” on the dashboard, then tap on “Geofences” > “Add geofence.”
- Enter a name for the geofence. Set the current location as the geofence or tap change and search for another place.
After creating the Geofence, you will be notified whenever the child’s device is inside or outside the established area.
How to put parental control on an Android from an iOS device?
Managing your child’s online activity is essential in today’s digital age, and with the FlashGet Kids app, doing so has never been easier, regardless of the devices involved. FlashGet Kids is multi-platform compatible, making it possible to monitor Android from iPhone or Android from Android.
Here is a guide on how to use FlashGet Kids to set up and manage parental controls on Android devices from an iOS device:
- Do wnload the FlashGet app for free and launch the app, then sign in with your FlashGet account.
- To add your child’s Android device, follow the steps provided in the application.
- After the device is added, you will be able to add Geofences under its location.
- You can also use the app to block the applications on your child’s device websites and remotely set the screen time.
Concluding remarks
Parental control on iOS devices needs to be enforced as a measure to ensure that the experiences that children have on these devices are safe.
Apple’s built-in features allow for the creation of a reasonable environment, but the constant development of the World Wide Web may mean additional measures are needed.
However, the integration of iOS’s native features and other applications, such as FlashGet Kids, allows parents to develop a complex safety mechanism for their families.
Frequently asked question
Do iPhones and iPads have built-in parental controls?
Both iPhone and iPad have an in-built mode known as Screen Time that acts as a form of parental control. It is available via the device’s Settings and can be tailored according to the requirements of each child.
Can I monitor my kid’s Android from my iPhone?
Yes, it is possible to track an Android from an iPhone device with the help of the third-party application FlashGet Kids. Such cross-platform solutions enable parents to track location, filter content, and monitor activity reports regardless of the operating system on the child’s device.
What happens to iOS parental controls when a child turns 13?
If a child is over 13 years of age, then he/she can create an Apple ID for themselves and potentially avoid restrictions. However, if Screen Time has been set up with the Family Sharing option, then the control stays put.

